
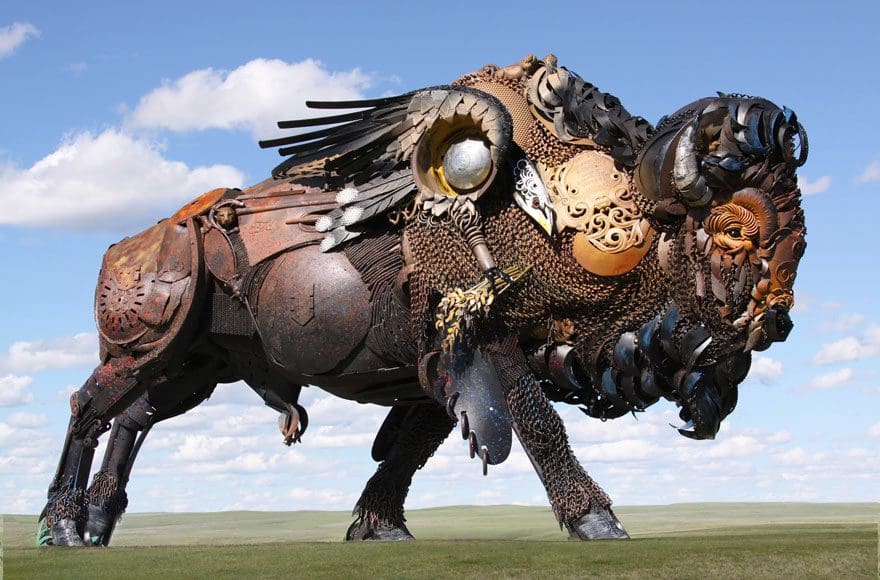
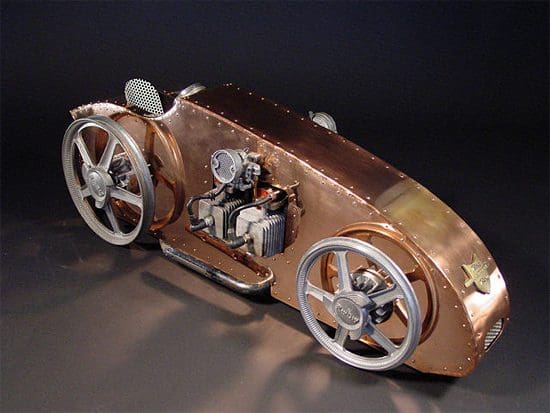
Steampunk Sculpture – John Lopez – BoredPanda.com

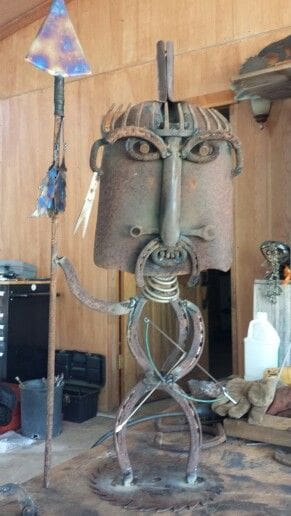
Steampunk Sculpture – Karen Cuolito – BoredPanda.com
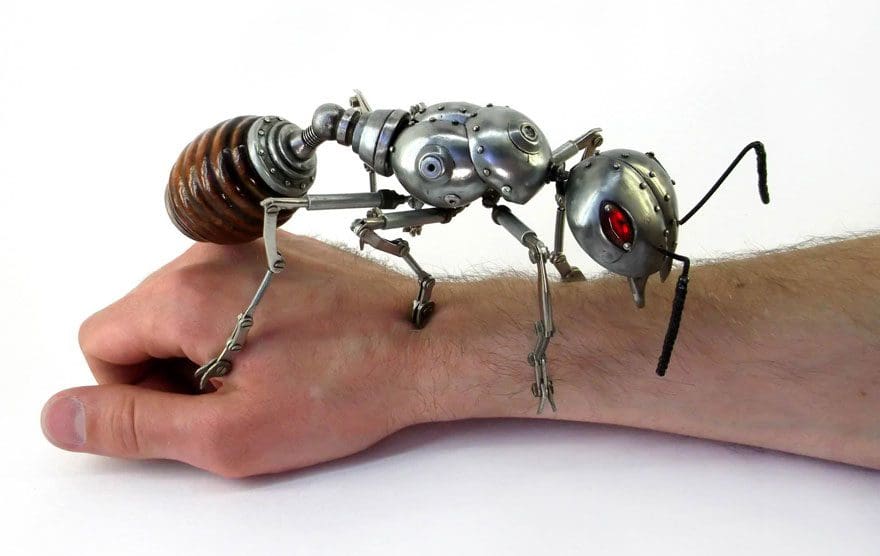
Steampunk Sculpture – Igor Verniy – BoredPanda.com
Steampunk Sculpture – John Lopez – BoredPanda.com
Steampunk Sculpture – Karen Cuolito – BoredPanda.com
Steampunk Sculpture – Igor Verniy – BoredPanda.com
Filed under Art From Found Things, metal art

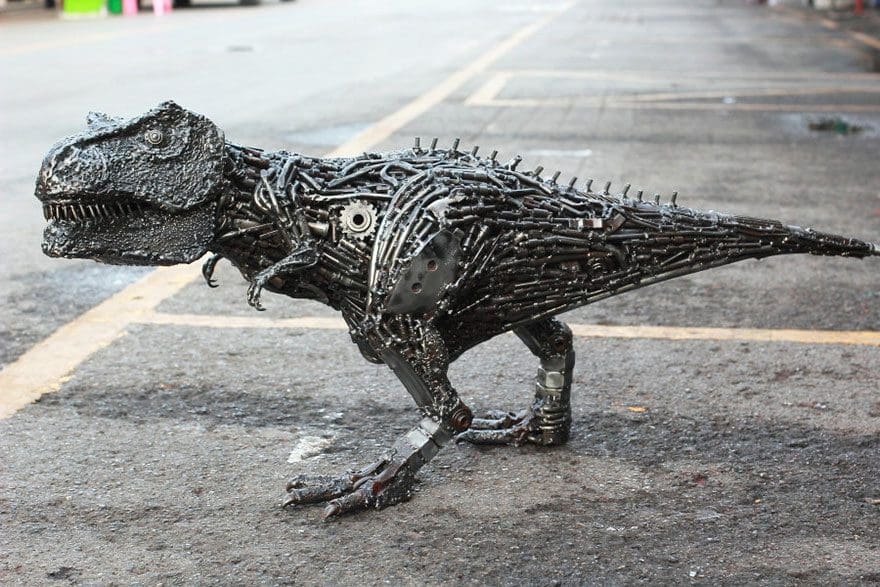
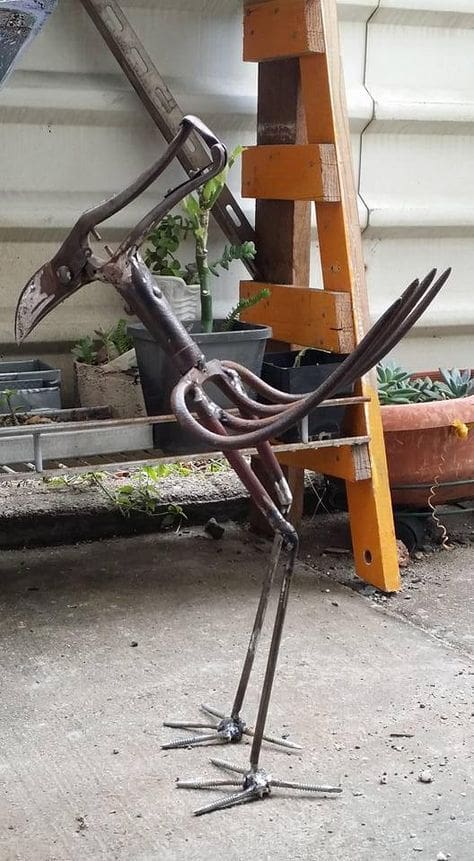
Steampunk Sculpture – James Corbett – Bored Panda
Steampunk Sculpture – Mari9art – Bored Panda
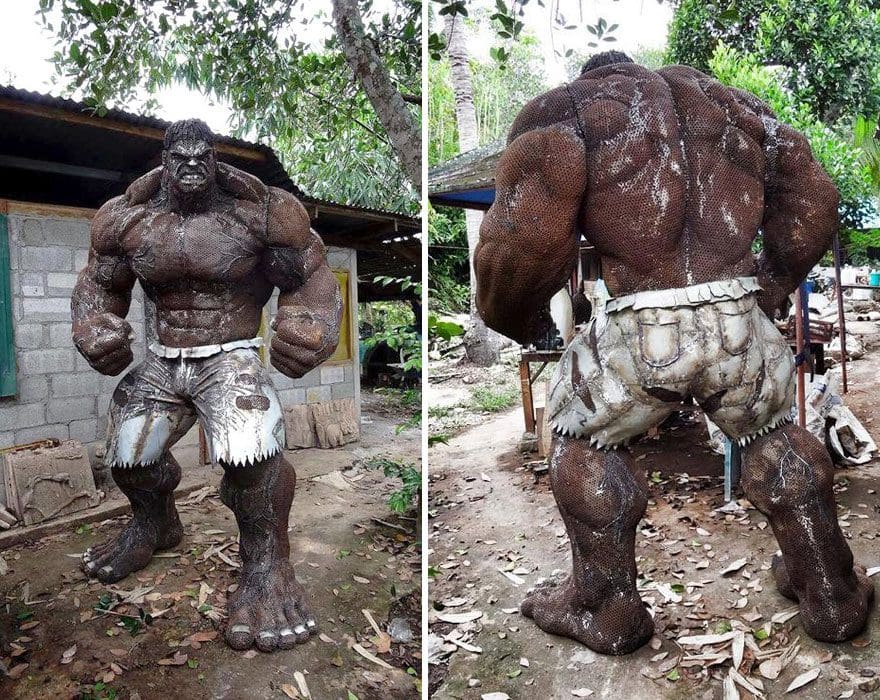
Steampunk Sculpture – Hulk – Bored Panda
Filed under Art From Found Things, Creativity, metal art

Steampunk Sculpture – Igor Verniy – Bored Panda
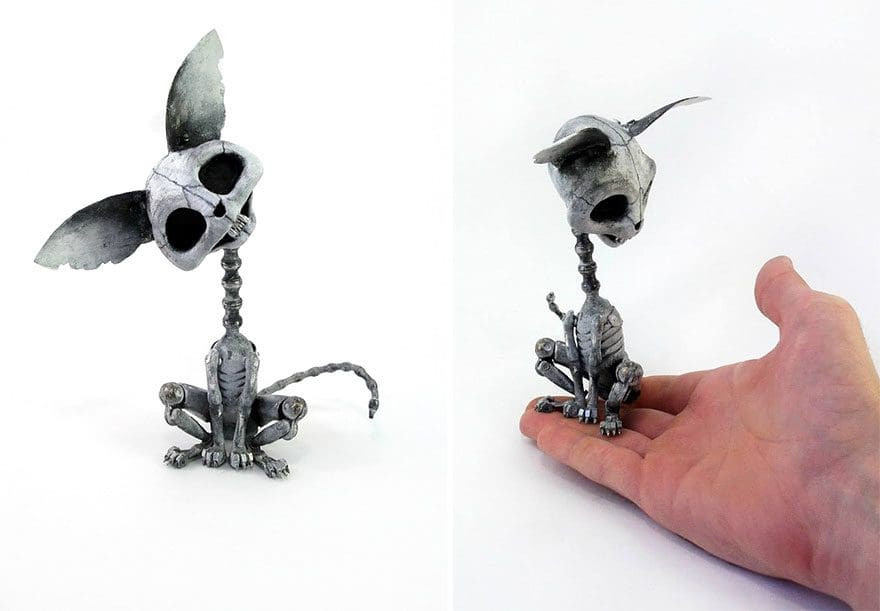
“Cat – Gatto” – Steampunk Sculpture – Igor Verniy – Bored Panda

Steampunk Sculpture – Igor Verniy – Bored Panda
Filed under Art From Found Things, Creativity, metal art

Steampunk Sculpture – Edouard Martinet – Bored Panda

Steampunk Sculpture – Arturas Tamasaukas – Bored Panda
Filed under Art From Found Things, Creativity, metal art
i.pinimag-originals

“Crab” – Artist Unknown
webmail1k.orange.fr
Filed under Art From Found Things, Creativity, metal art

I think this is my favorite of the many mailbox decorations we’ve made. It makes me feel good when I see it. This is the back of the piece. you can see where I’ve tried to incorporate the mounting bar into the design.
Calvin and Hobbes is a daily comic strip by American cartoonist Bill Watterson that was syndicated from November 18, 1985 to December 31, 1995.

This is the front. The piece is about 2-1/2 feet tall and about the same wide – 3 feet + with the mounting bar and tail. We grabbed the design from the net. My husband translated the picture into code that the computer-guided torch on our CNC table can understand and cut out. We used a transparency and overhead projector to mark the bare metal for painting. I then painted both sides and then sprayed a clear protective spray on it. I hope this decoration gives people a warm feeling as they drive by our home.
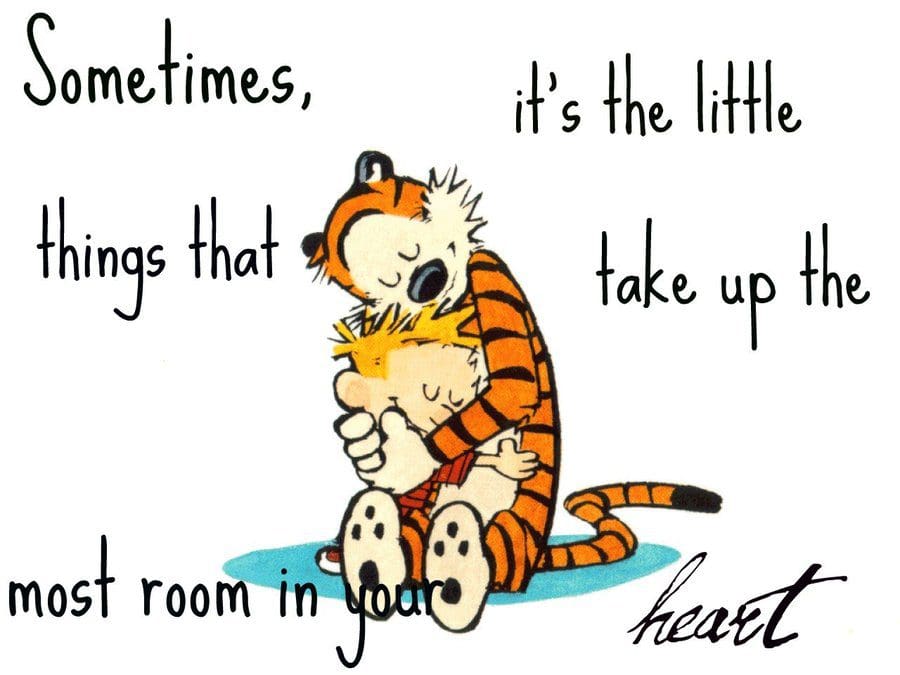
Calvin and Hobbes by Sarah, Quotesgram.com
Filed under Hobbies, Lewis Art, Lewis Mailbox Decorations, metal art

We found this cute drawing on the net and decided to use our CNC setup in the shop to cut it out for a mailbox decoration next December. My husband did his magic, generating the G-code the computer uses to guide the torch on the cutting table to cut out the design from a sheet of metal. The piece is about three feet wide and about 2-1/2 feet tall.

We used an overhead project and a color transparency to mark the piece. I’m starting to paint it now. I’m doing the back side of the piece first to work out any problems. The first code I call ‘color blocking’ because the first coat on metal is so awful that it only serves to mark the areas as particular colors. The second coat enables you to finally see the design well and then put accents on.
I did the first coat on the back side yesterday. Today I’ll try to do the second coat. I’ll take some progress pictures and post them.
Filed under Lewis Art, Lewis Mailbox Decorations, Lewis projects
In December last year, we discovered that my husband and I shared a ‘senior moment,’ with both of us thinking we had created a new mailbox decoration for the Christmas season. We looked in the hanging bar where we keep all of our mailbox decorations, but it wasn’t there. We looked laboriously all over the shop, thinking maybe we had started it, but hadn’t finished it. Nope. Nada.
After finally admitting we were definitely losing it, we started over. My husband used the reference picture we got from the net and generated the computer code that tells the torch what to cut.

Yesterday afternoon he made the piece we use to attach the piece to the mailbox and got it welded to this. We attached the piece to our stand with a huge clamp, then used the overhead projector to mark the piece on both sides. It is now ready for me to paint.
I always start with the back, making decisions and working out any problems there before I turn it over and paint the front. I’ll post progress pics as the piece is painted.
Filed under Lewis Art, Lewis Mailbox Decorations, Lewis projects

When we first started making metal decorations to attach to our mailbox, we used to have to manually cut the designs out using a welding torch and then spend a LOT of time smoothing all the edges, front and back, before even thinking of painting it. It was the best we could do at the time and some decoration is certainly more fun than none.
When we got the CNC set up, where my husband could convert a drawing we found on the net to a code the computer could understand and replicate, cutting it out of sheet metal, we upped our game and a wonderful new adventure began! We have so much fun making these. We now have too many to display each year! We change our decoration twice a month, and then we try to display as many of the other designs we’ve made that are unrelated to a certain holiday as possible.
Now my husband looks for designs that allow us to display something 3-dimensional to take it out of the more ordinary designs. Such a fun way to spend time together – scheming on what to make, how we’re going to make it, cutting it out, marking it, and painting it – and then, finally putting it up on the mailbox, hoping that others will smile as they pass. :0)
Happy St. Patrick’s Day!
Filed under Lewis Art, Lewis Mailbox Decorations, metal art
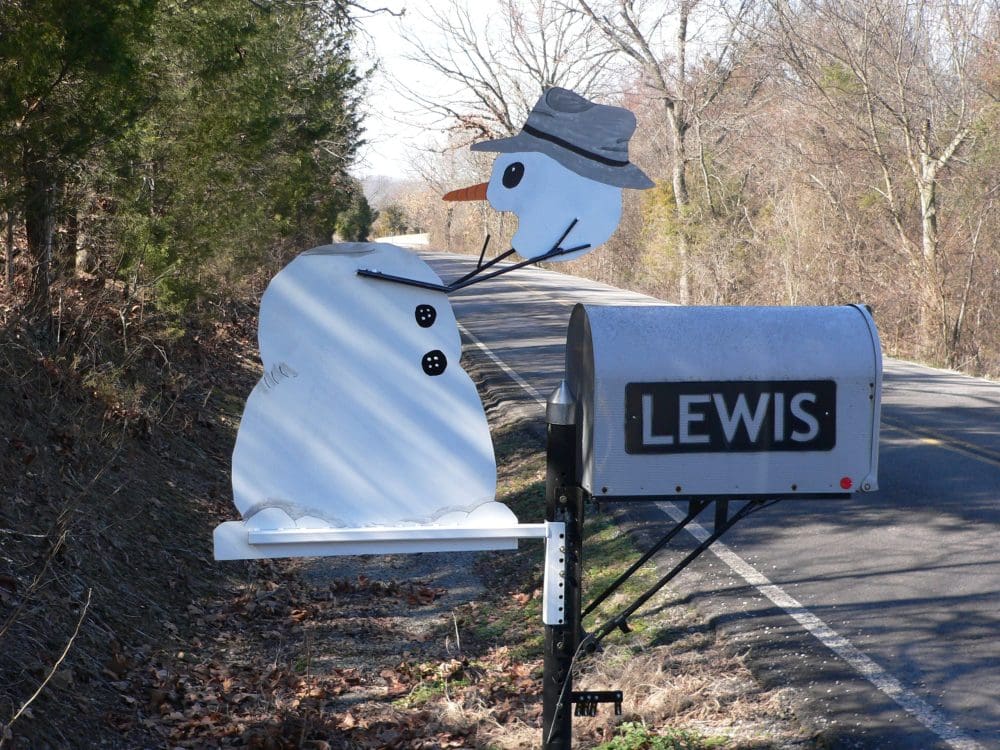
We love Calvin & Hobbes. One of our favorite parts of the series was the killer Snow-Goons. Today it’s 77 outside, but tonight a cold front is coming through, so we may get our chance to build one of our OWN Snow Goons before the winter is over. This is the back of the piece, where I try to blend in the attachment support into the design.

I love the way my husband was able to weld ‘arms’ on and make the piece 3-dimensional, with the Snow Goon holding its head.
Filed under Lewis Art, Lewis Mailbox Decorations, metal art

saga
I’ve been a slug today. I guess I wore myself out yesterday, feeling 110+ years old when I woke up today, joints creaking, muscles aching. We did errands, but that was it for the day. I had a nice nap under my throw in my recliner this afternoon.
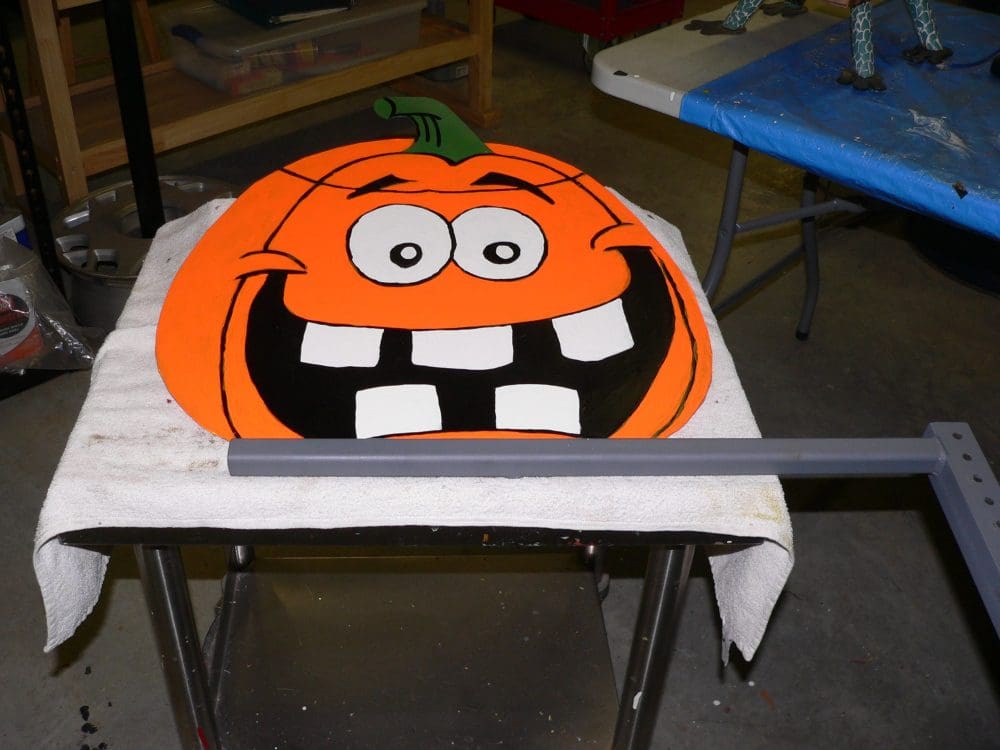
One thing I forgot to tell you that I did yesterday was finish the repainting of the Jack-O-Lantern Pumpkin mailbox decoration for October.
I don’t think he’ll glow in the dark, but he’s the very brightest orange I could find, and I think he’ll light up well when headlights shine on him.
He looked okay on the mailbox last October, but I was hoping for a Day-Glo type look, if not glowing in the dark. I used a paint called, Neon Orange. The only actual glow-in-the-dark paint I could find was in a spray can, which I couldn’t use on the piece.

This is the front.
And this is the back. We hung him up on the proper hook in the shop, waiting for next October.
Next, I’ll be doing a refurbishing on our ‘box turtle’ who has an eye falling off and paint pealing off his ‘shell.’
We’re on the edge of the map as to whether we’ll get a wintry mix this evening into tomorrow morning. We’re thankful to have a warm, dry home with our animals close around us.
I hope you’ve had a happy day, too.
Filed under Lewis Art, Lewis Mailbox Decorations, Lewis projects, metal art

We put this up this morning. I forgot to take my camera (surprise!) and so I’m posting pics from the last time we put it up, when things were green and the weather was deliciously warm. Today it’s 30, but sunny. Tonight we’re supposed to get a wintry mix and tomorrow the low will be 14 and the high 21….

We needed something happy to take our minds off another possibility of ice. The Cheshire Cat is just the ticket. :0)
Filed under Lewis Art, Lewis Mailbox Decorations
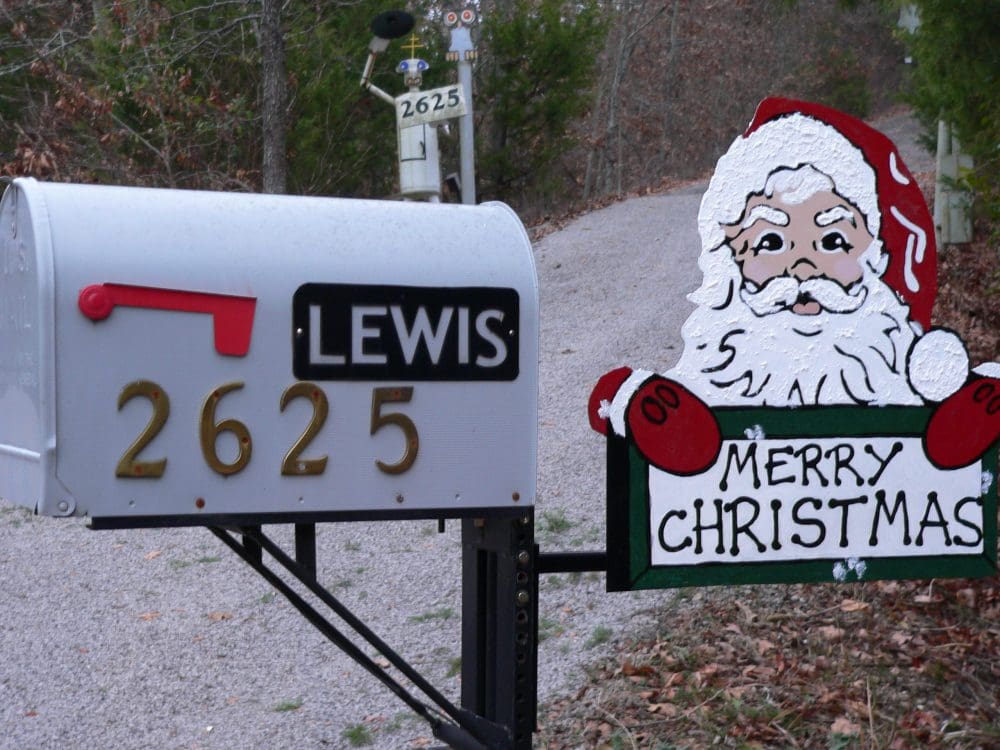
We put our Santa mailbox decoration up this morning. I’m not sure if you can tell it from this picture, but the white of his beard, the snowball and fur on his hat, his eyebrows, mustache, and bands on his mittens are all textured with SnoTex, so they have a 3-D feeling. I like that stuff a lot.
We have a mystery, though.
I asked my husband if he would get the mailbox decoration that has two children on either side of a Christmas tree so that we could put it up today. He came back, saying he couldn’t find that one, but had brought back Santa. I went out to the shop and looked through the decorations and I couldn’t find it, either!
I don’t know if I’m losing my mind or what! I can’t find any pictures of the decoration, so there seems to be no record of our making it. I’ll have to look on the net and see if I can find it again. Could I have DREAMED we cut it out and painted it?
Kind of rattles my confidence a bit…
Filed under holidays, Lewis Art, Lewis Mailbox Decorations
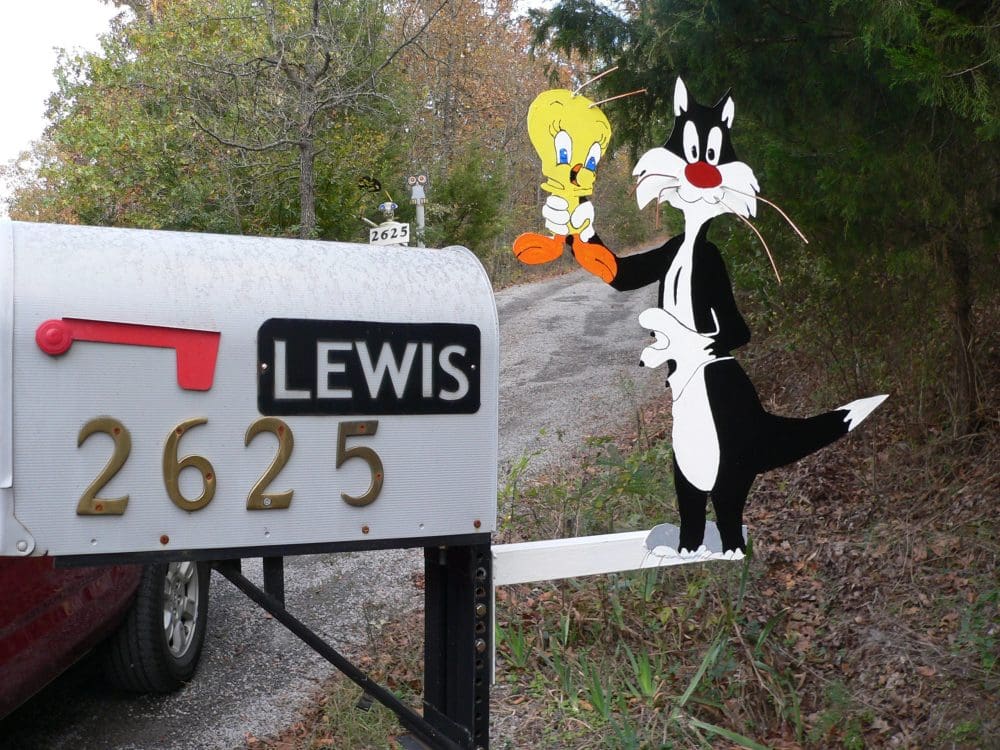
This is the front of the Sylvester and Tweetie Pie mailbox decoration. My favorite thing about this one is that my husband was able to weld on whiskers for Sylvester and hair on Tweetie Pie without burning through the metal – a hard thing to do!
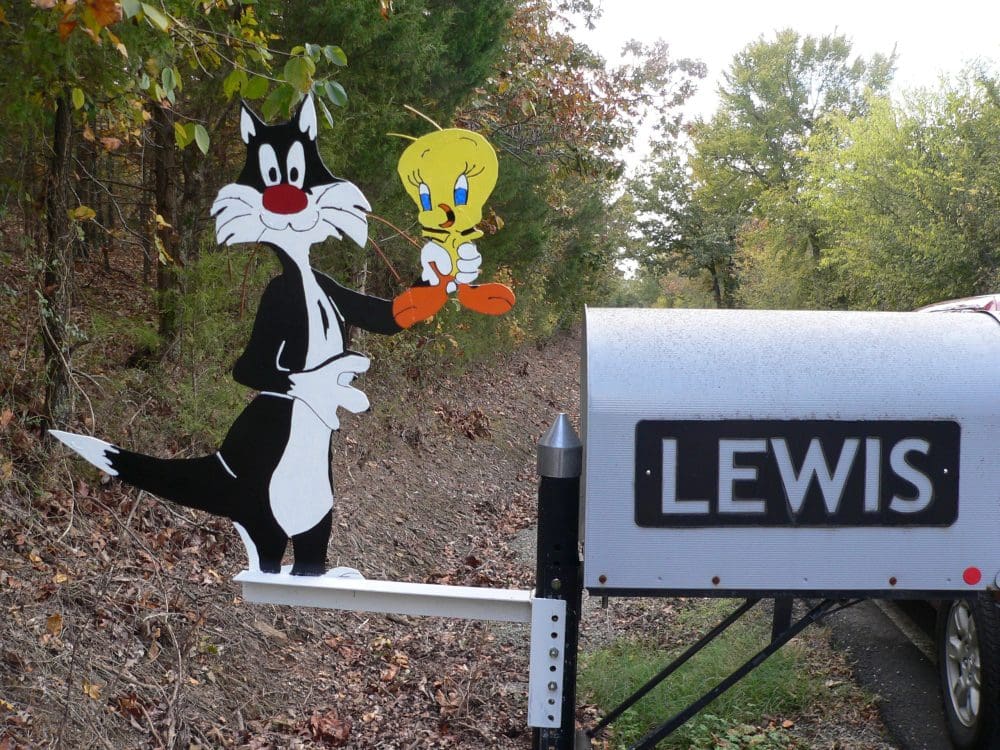
Here’s the back of the piece.
Filed under Lewis Art, Lewis Mailbox Decorations

We took the Jack-O-Lantern down this morning and took it back to the shop. I’ll clean it carefully and then use some really bright, neon orange paint to see if I can get it to show up better at night when car lights hit it.
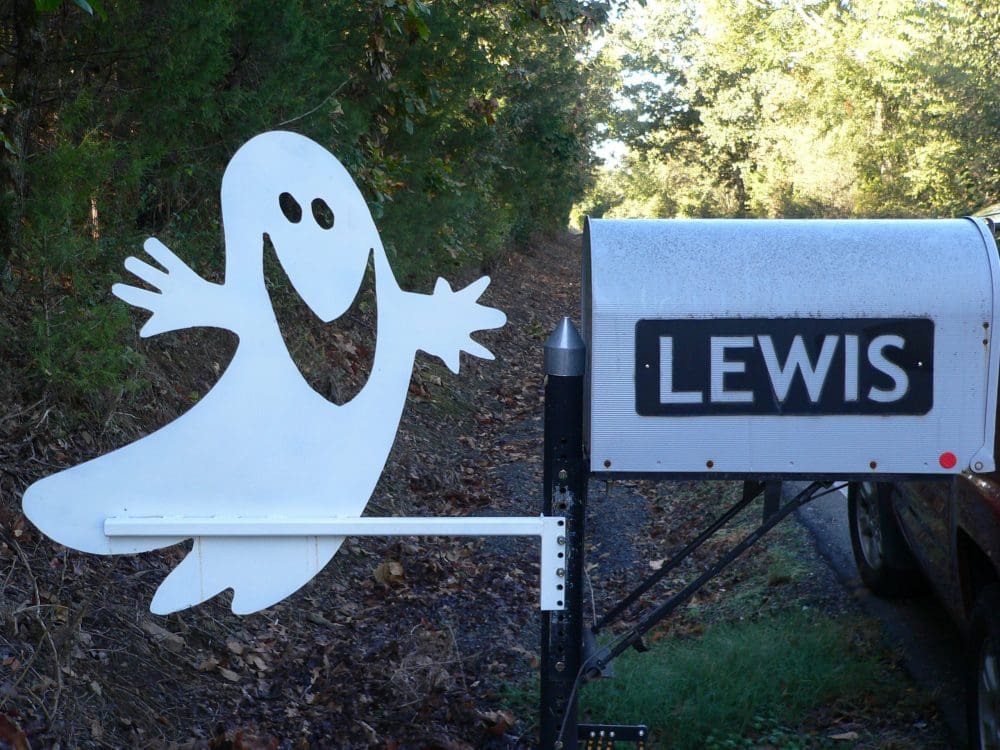
We put our ghost up for the rest of the month. This is the back of the piece.
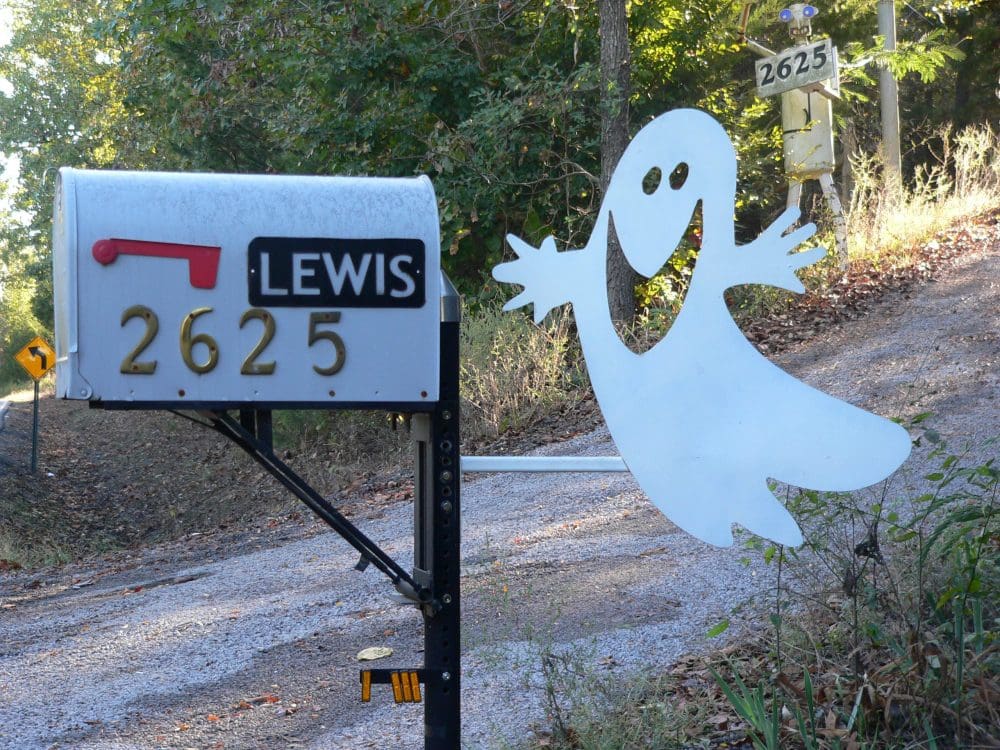
This is the front. It’s funny, but this is one of our most simple pieces. It shows up at night better than anything we’ve made before or since. I love his happy expression. I hope he brings a smile or two.
Filed under holidays, Lewis Art, Lewis Mailbox Decorations, metal art
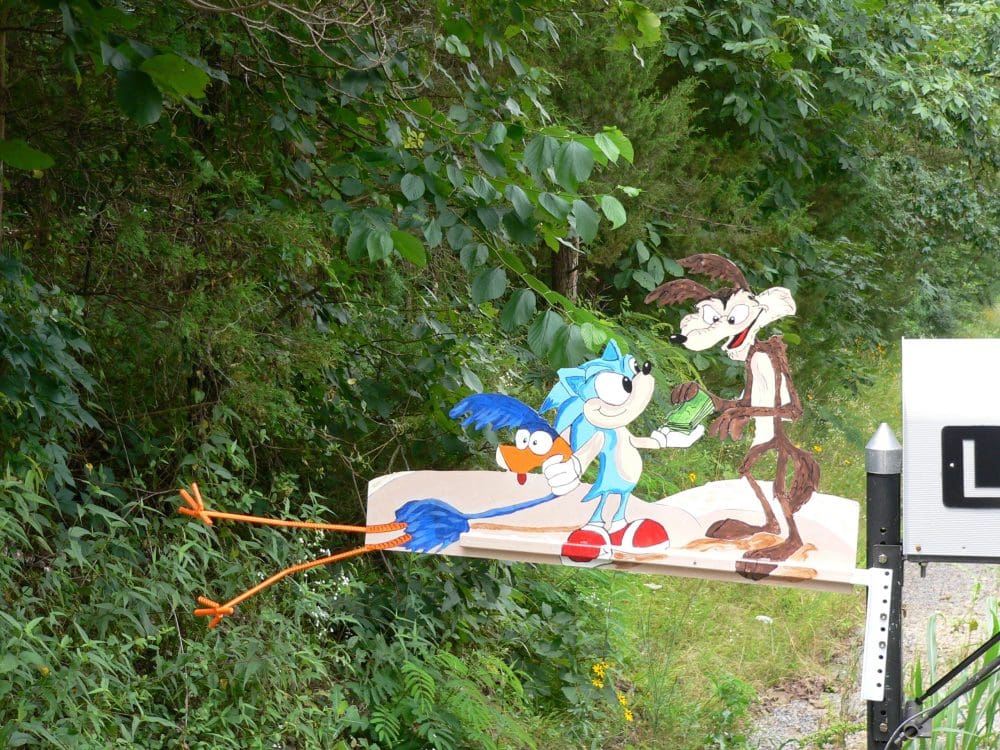
Yesterday we changed our mailbox decoration on the way to Lunch Bunch. This is Wyle E. Coyote paying Sonic the Hedgehog to strangle the Roadrunner. This is the back of the piece. My husband is pleased with this one because we managed to add a bit of 3-dimenionsal quality to it with the legs welded onto the main piece.

Here’s the front of it.
The school bus goes by our driveway on week days. I hope that the kids get a kick out of seeing what we put on the mailbox.
Filed under Lewis Art, Lewis Mailbox Decorations
It’s the chicken and the egg question – we’re not sure if WE brought back the hot weather by putting this up on the mailbox on the 15th, or if it would have come anyway. If it’s our fault for the 95 degree weather plus a heat index making it feel like 106, we apologize. It’s always hot in Arkansas in the summer, and particularly in August. This year has been so wonky, though, with the grass staying green all summer, rather than turning brown and crunchy, that we got spoiled. It’s like a steam bath out there now. This is the back of the piece. I tried to blend the support bar into his feet.

Here’s the front. We thought this decoration wouldn’t be appropriate in that we’ve had so much rain, but that won’t be a problem much longer.
Filed under Lewis Art, Lewis Mailbox Decorations

We put up another of our favorite cartoon characters – The Tasmanian Devil – on the mailbox today. This is the back of the piece.
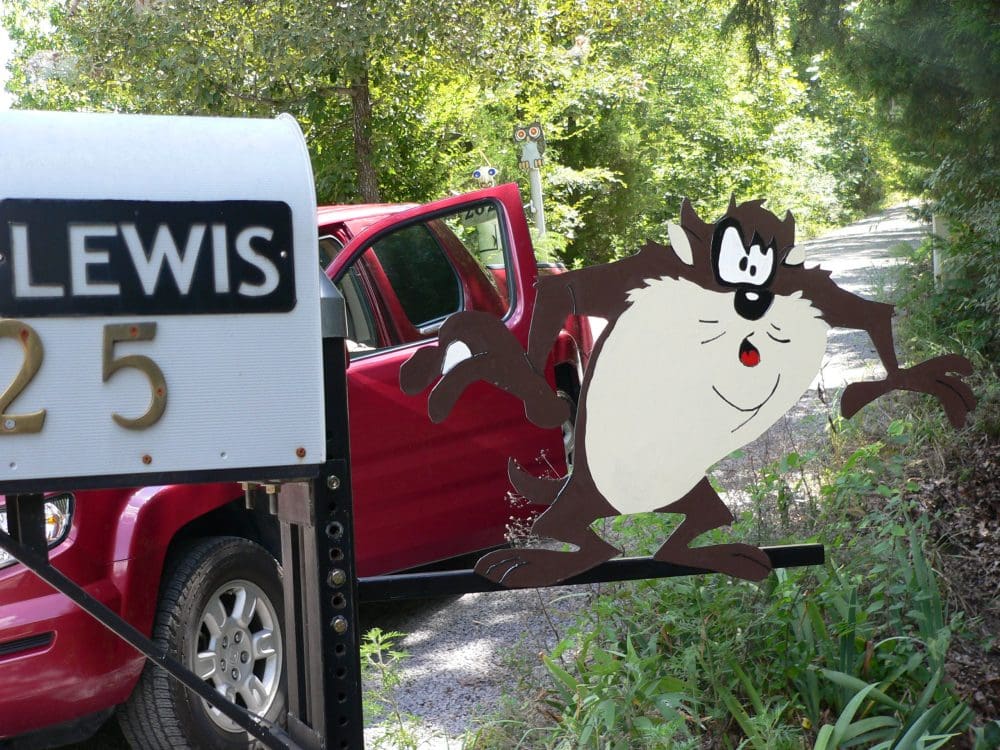
And this is the front. We hope he gives people a smirk or laugh as they drive by.
Filed under Lewis Art, Lewis Mailbox Decorations

the afterlife of billy fingers via cathy ruggiero
Now my husband wants me to add more yellow to the sun/moon piece with the air brush.
I’ve quit worrying now about whether its ‘good’ or not, and am concentrating on having fun with the air brush, plus making something my husband is happy with. I’m really enjoying the experimenting with a totally new kind of painting. We’ve ordered a set of air brush paint, empty bottles for each color we use, plus an adapter and hose so we can hook it to the air compressor in the shop, rather than having to use a can.
So far, we’re learning to clean the system properly, keep it going, and adjust the spray a bit. I’m hoping to find a video on YouTube so I can watch someone who knows what he/she is doing.
Learning a new technique opens up a whole new world of possibilities, making your mind race and your mouth water.
So, maybe the third time is the charm on the sun/moon metal wall hanging and maybe it isn’t. We’re having fun in the trying.
Filed under Attitude, Challenges, Childlike Fun, Lewis Art, metal art
This shows you the sun/moon metal wall hanging after I masked parts in order to use the air brush for shading.

Tracing paper is off. Finishing touches are ready to be done.

Offset ‘moon’ ready for mounting on the piece.

The piece is now drying. I’ll take a final pic when this is up on the wall in the office.

I finished painting this and wasn’t satisfied. It just didn’t turn out the way I had hoped. My husband tactfully agreed. Today I started scraping off a bunch of the paint. I’m going to repaint the two parts with background paint the best I can. Then we decided, as we were discussing what might be done, that I might try to use a used air brush setup I got a long time ago but have never used.
So, I’ll finish scraping paint, redo the background colors with sponge or cloth, and then we’ll see what we can do with the air brush.
Maybe we can do a better job this time.
Filed under Lewis Art, Lewis projects, metal art

Dodecapod.Com
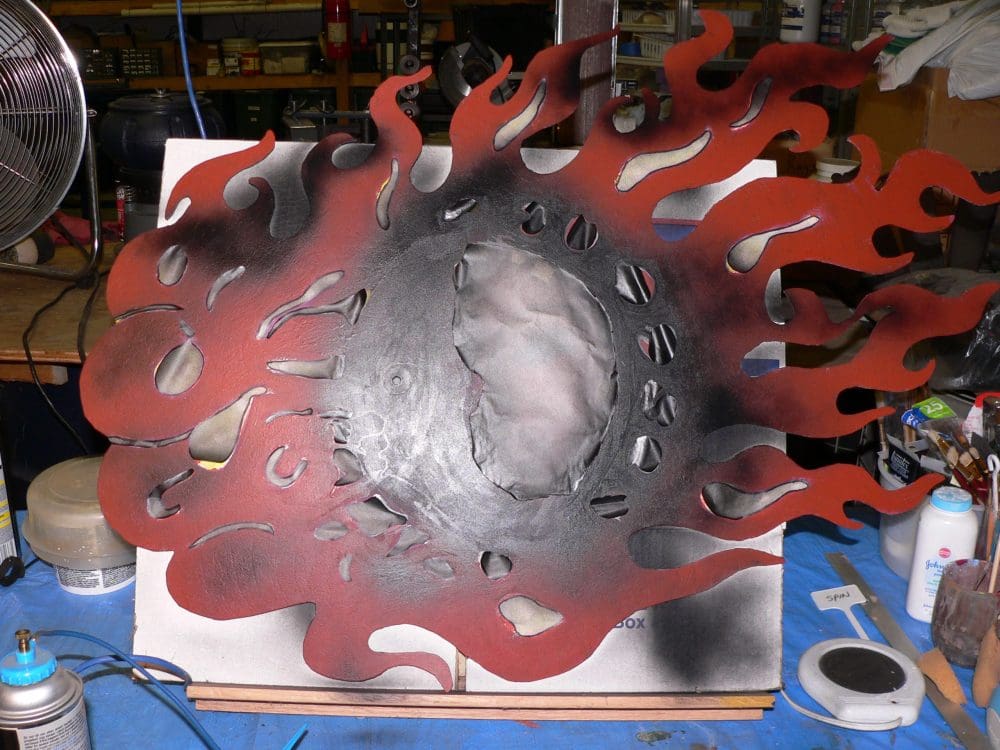
My husband found this design on the net and we both liked it. I found the source, but not the name of the artist. We both liked it a lot and we’re in the process of trying to make it.
My husband used the CNC table and the computerized torch to cut this out. The piece is about 3-1/2 feet wide and about 2 feet from top to bottom. The piece is so much work for the torch that it overheated. We had to stop the cutting process and wait for the torch to cool down, and then start it up again, fingers crossed it would remember where it was in the design. Thankfully, it did. My husband still ended up having to cut out parts of it by hand.
He made the blue moon separately so that we could mount it on a spacer. We’ll attach it to the main piece through the back with a screw to give the piece more of a 3-dimensional quality.
I marked the metal yesterday.
If we can get our a/c fixed today, I’ll start the painting soon.
This will be a really difficult piece to paint. There is a LOT of great shading on the piece, making the sun look 3-D, for example, and the rays look curled up and wavy. I’ll give it my best shot.
This is the first piece we’ve seen in quite a while that got us excited about cutting out and making something. If it turns out all right, we plan to hang it on the wall in our office.
Filed under Lewis Art, Lewis projects, metal art
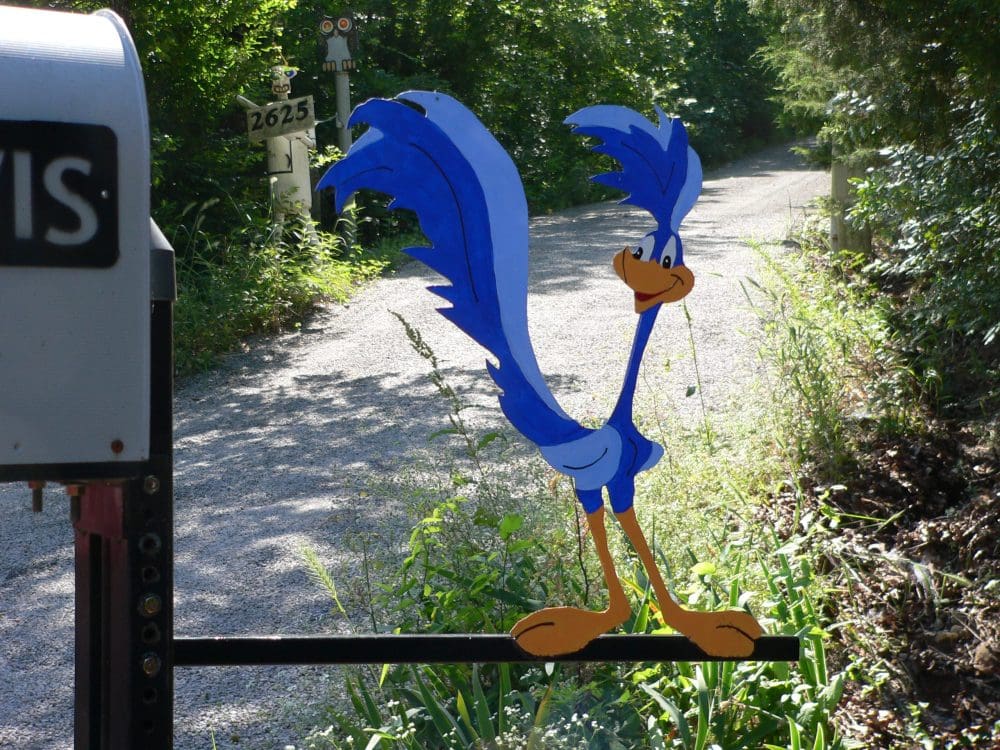
Wyle E. Coyote and the Roadrunner cartoons are some of our all-time favorites. The Roadrunner never runs out of energy, can run really fast and stop on a dime, and never lets poor Wyle win.
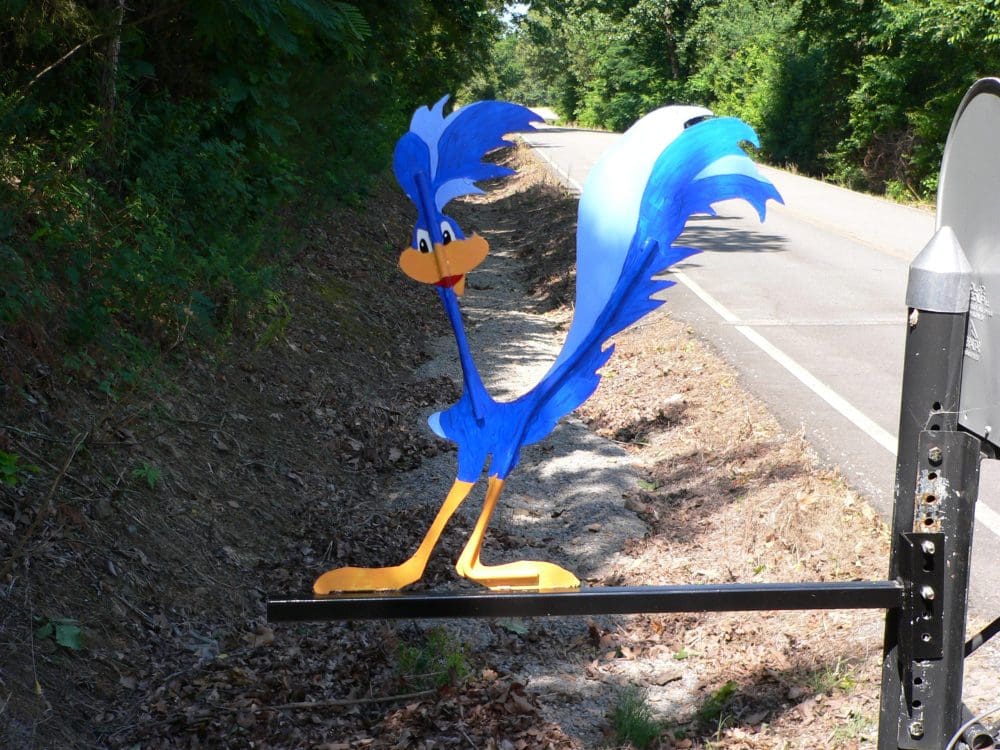
This is the back of the piece. Beep! Beep!
Filed under Lewis Art, Lewis Mailbox Decorations
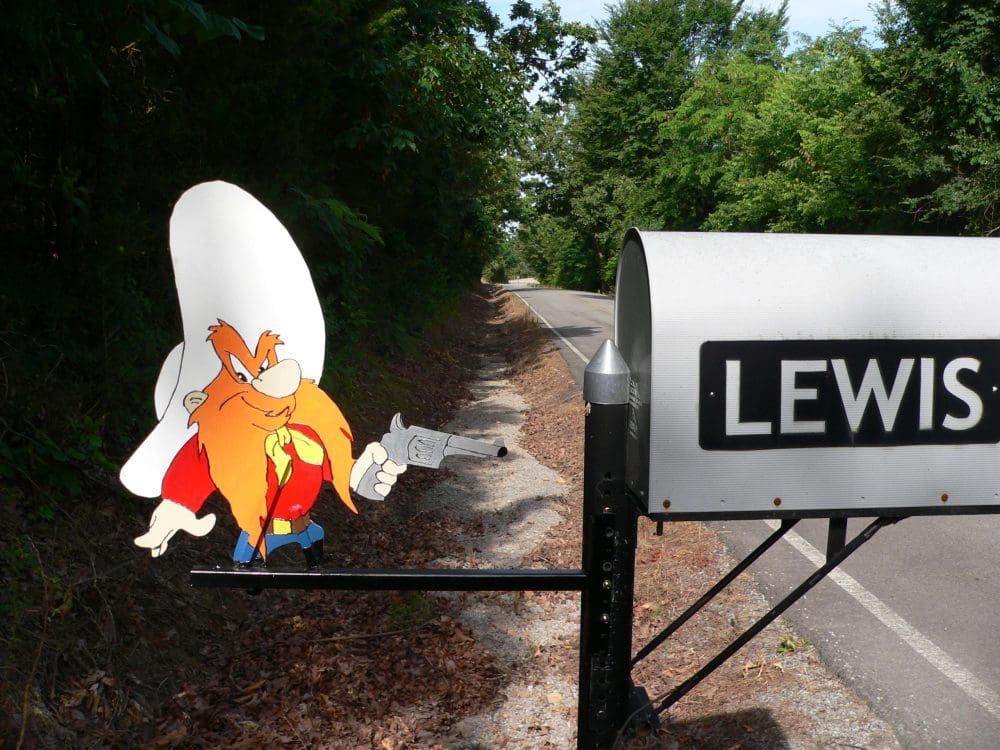
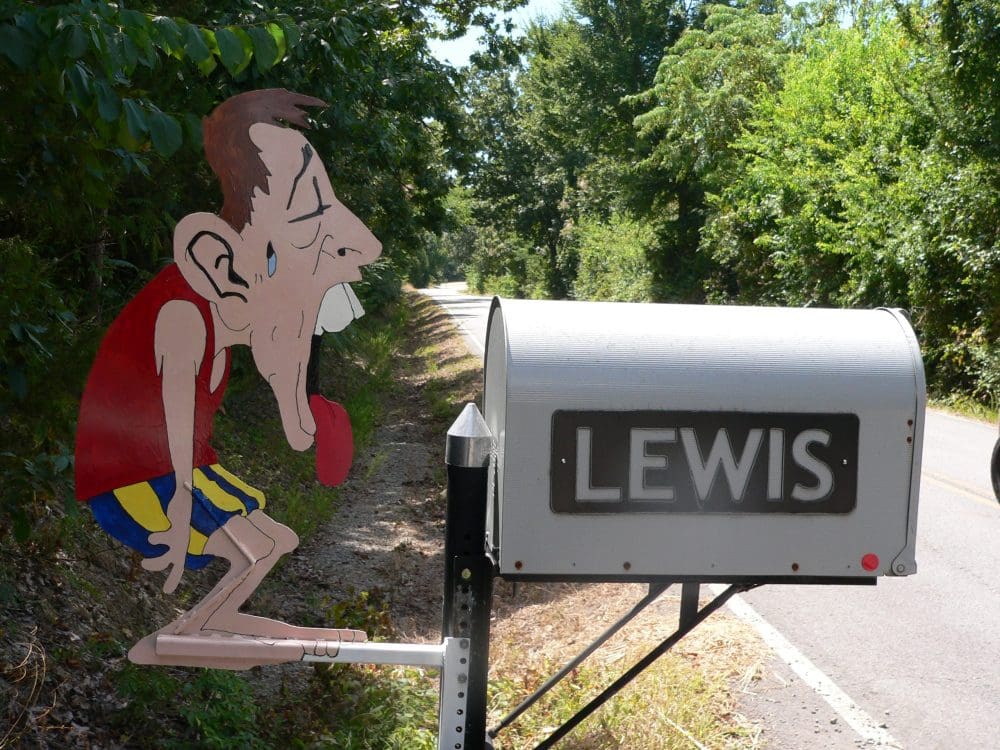
On the way to town this morning, we put up Yosemite Sam, one of our favorite cartoon characters. This is the back of the piece.

This is the front. He makes us smile.
Filed under Lewis Art, Lewis Mailbox Decorations

Radiologist – ShoppingZonePlus

Baseball – ShoppingZonePlus
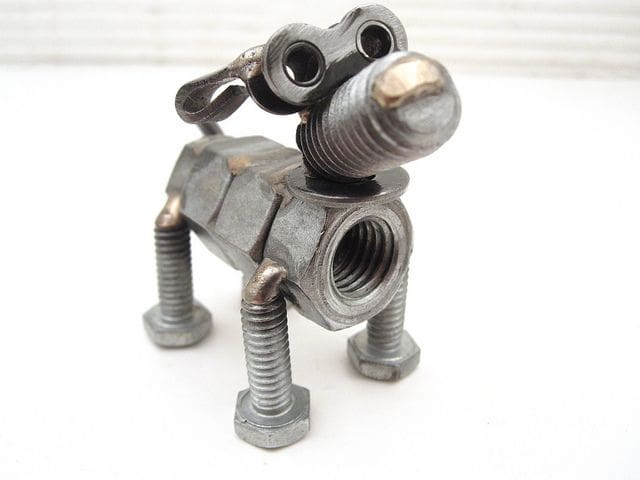
Welded Nuts and Bolts Dogs Sculptures – Pinterest
Filed under Creativity, metal art

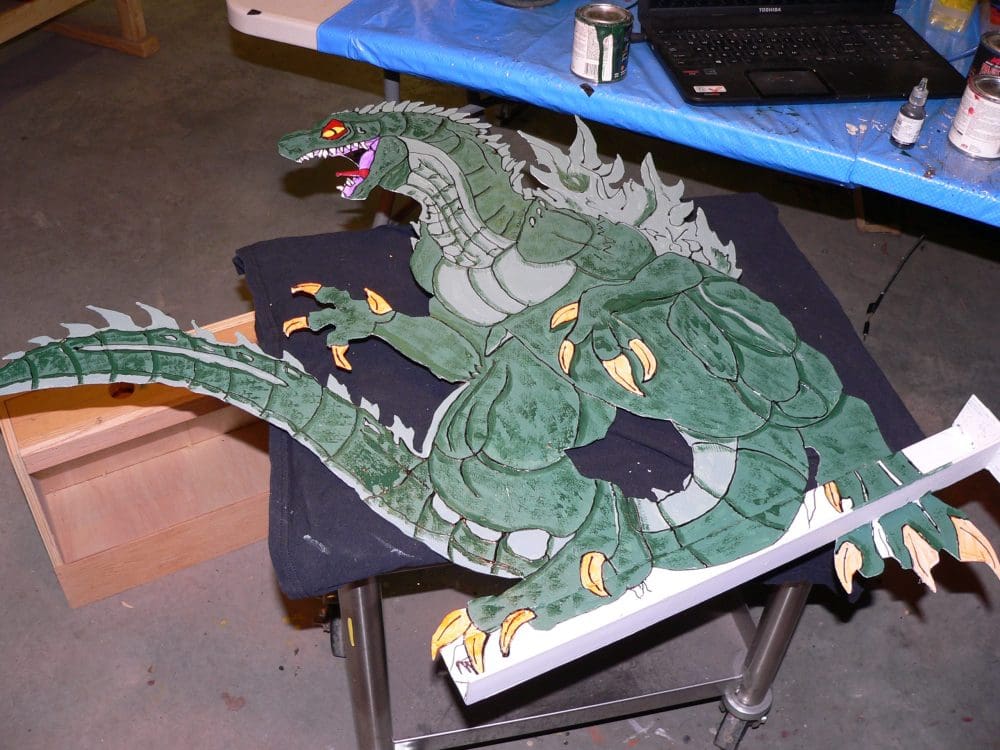
This is the back of the piece. You can see where I had to paint the bottom of the piece on the mounting bar.
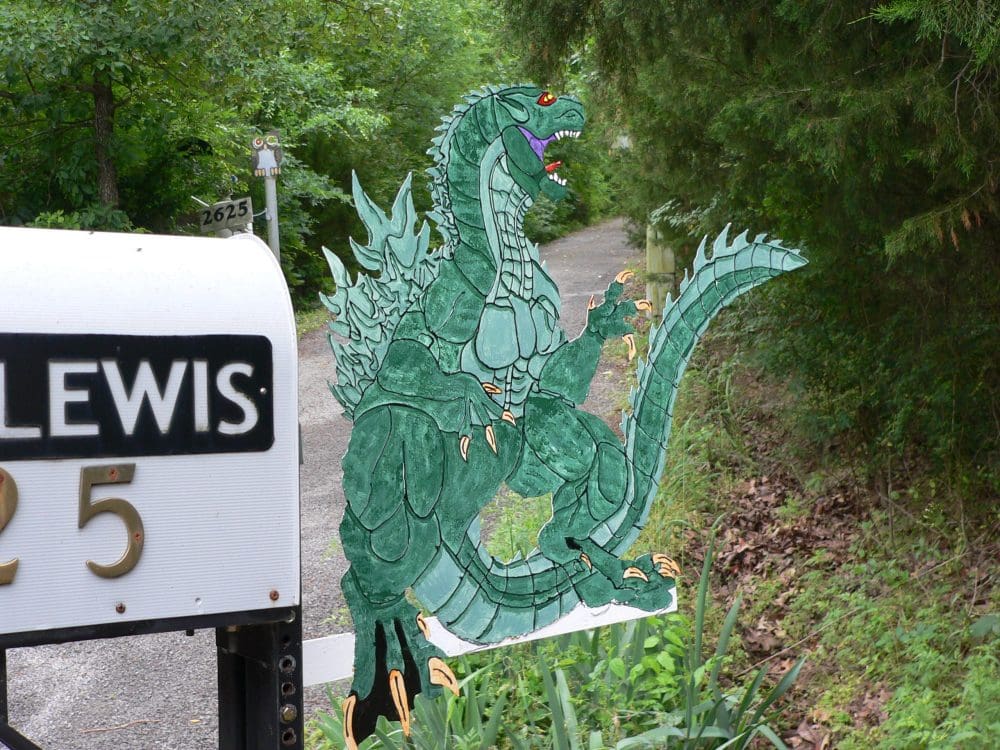
Here’s the front. He doesn’t show up far down the road as some of our pieces do, but my husband is pleased with him. I’m relieved that he’s happy. We love Godzilla movies. They’re so awful! :0)
Filed under Lewis Art, Lewis Mailbox Decorations
We put Godzilla up on the mailbox yesterday, but I forgot to take my camera to take pics. We went to town three times yesterday, trying to get everything done we needed to before my husband had his second cataract surgery this morning. Simply too busy.
This morning we were up at 5am in order to be at the hospital on time for the surgery. Needless to say, I was barely functional at that hour, and so didn’t remember to take the camera.
Maybe I’ll remember tomorrow. This was a difficult one to paint. My husband says its one of his favorites, so I’m happy he’s pleased with our efforts. :0)
Filed under Lewis Art, Lewis Mailbox Decorations
I told you recently that I was thinking of seeing what – if anything – I could add to the world of nut and bolt art. For this I would need to learn to weld. We have the equipment. We have the nuts and bolts and other assorted ‘stuff.’ I’m doing a survey of what is out there, and I have to tell you, I’m getting intimidated.
The people creating this stuff are really talented. They take a pile of stuff and create something that makes you smile. Their ideas are wonderful and their talent is great. I’m getting a bit intimidated, but I’m going to continue my research and then get out to the shop and see what I can come up with that’s different.
Meanwhile, here’s more of the wonderful things I’ve found –

Bored Art

Doctor – Shopping Zone Plus

Farmer on Tractor – Bolt People
Filed under Creativity, metal art
I’m thinking about trying to make some critters using nails, nuts, bolts, screws, and other small stuff. The first step is seeing what has already been created, and then seeing what spin I can put on the art, if any. I’m having a lot of fun seeing the wonderfully creative things people have created!

Papi and Guapo – Brown Dog Welding via Flickr.
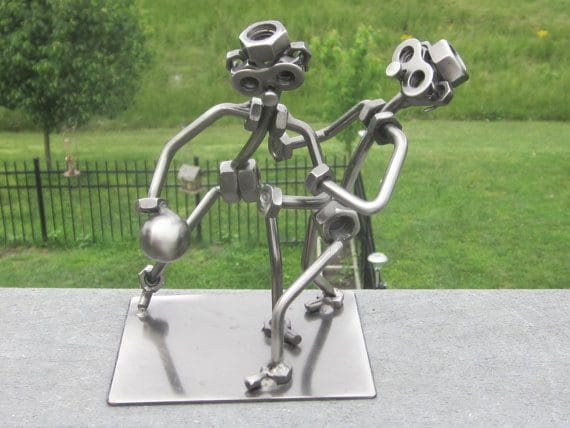
“Basketball Players” by LeftOverStuff

Bike Chain Welding and Wiener Dogs
Filed under Creativity, metal art

Brian Mock

Brian Mock
Brian Mock
Brian Mock
Welded Sculptures from Found Objects
Colossal
Portland-based sculptor
Mock says of his work:
“I am intrigued by the challenge of creating an entirely unique piece from an eclectic collection of discarded objects. Giving these old, common items a new and extraordinary life as one sculpture is an artistically challenging yet gratifying process. This type of work is also designed to be highly interactive and prompt viewers to question the reality of what they see. Audience reactions fuel my motivation.”
Filed under Creativity, metal art

I loved the Pepe Le Pew cartoons, and particularly when his ‘girlfriend cat – Penelope’ was included. I still smile when I see them. This is the back of the mailbox decoration. I tried to blend the horizontal support bar into the figures.

Here is the front of the piece. I hope people smile as they pass our driveway.
Filed under Lewis Art, Lewis Mailbox Decorations
