Category Archives: Lewis projects

Last Night’s Progress on Greenhouse

After installing two pvc straps for each rib of the skeleton during the day yesterday and painting the pvc pipe to keep it from giving off fumes in the sun that deteriorate the film we’re going to use, we got the skeleton up right before dark!


I wasn’t sure how difficult it would be to put the pvc pipe skeleton up, but I stood in the middle, holding the skeleton up as high as I could while my husband took the ribs one at a time and slipped them into the straps on one side of the greenhouse. Then it was easier to get them in on the other side. We then went all the way around, tightening the screws that held the pvc straps.


We’ve put in one session out there today, working on installing the door at one end. We decided to take a break, and then the rain started. When we have a chance to catch our breaths and the rain stops, we’ll do another session. It’s starting to come together!

Leave a comment

Filed under Lewis projects

Greenhouse Progress – Friday

Yesterday we put the 10 foot pieces of pvc pipe onto the ‘spine’ we had made previously.  Today we went to Yeagers and got 1 x 2’s and 1 x 4 x 12’s and a paint brush. When we got home from Lunch Bunch, I started painting the pvc pipes and connections while my husband created my door!

The film people warned us that if we just used the film and the pvc pipe, the fumes from the pvc in the sun would cause the film to deteriorate. My husband scoffed, but I took them seriously. They said that if we painted the pvc pipe with latex paint, it would solve the problem.

I spent 3 hours (2 sessions) out in the hot sun painting the white pvc pipe beige. It didn’t matter what color we chose. Apparently the latex paint barrier stops whatever the chemical reaction is between the pvc stuff and the film. I got really hot and tired, but I finally got two coats of paint on the side of the pvc pipe that will touch the film.


Here you can see the pvc pipes coming out of either side of the spine. This is what I was painting today. UGH.


Here’s another view of it. After I cooled off some, my husband was raring to go again, this time wanting to screw on the pvc pipe straps on the outside edge of the foundation on the 1×2’s my husband screwed on there earlier. We put two straps on for each end of the pvc pipe, screwed in loosely, until the ‘great pvc pipe raising’ we’ll do later this evening when the sun goes down some. I’m picturing standing the pvc pipe on end, one of us holding the pipe complex while the other one puts the end of the pipe in the straps and then tightens the screws. When one side is in, then the other side should go in more easily, with our bending the pipes down to go into the straps. Wish us luck, please.

Leave a comment

Filed under Lewis projects

Greenhouse Progress – Thursday, June 1st

Last time I showed you where our wonderful tractor guy, Eric, cleared some land for our proposed greenhouse.


This is the foundation of the greenhouse. It will be 12 feet wide x 14 feet long. You’re looking at it from the west, looking east.  We put down two sheets of black 4 mil plastic sheeting that we hope will keep the weeds from growing. This will be the floor of the greenhouse. When we get a bit farther, we’ll put rocks and bricks around the bottom to hold the sheeting in place better.


My husband made four of these stakes. The pipe is solid and 2 feet long. Then he welded on heavy angle iron, and then drilled a gazillion holes so that we could attach the foundation wood at whatever level needed for the structure to be as level as possible. Since the piece of land isn’t flat, and we run into solid rock at different depths for each stake, this is quite a process. We drilled as deeply as we could, then poured some water in the hole, and then used a sledge hammer to get the stakes in. Then we screwed the wood to the stakes after leveling it and making sure the corners were square.


This is another view.


This picture is taken from the south, looking north. We’re going to put the door on the north end and an exhaust fan on the south end.

We’ve had two sessions of work today, although we don’t have a lot to show for it, picture-wise.

We bought a sheet of plywood, lots of 2x4s, and lots of pvc pipes and fittings today. When we got home, we took it all out to the shop and cut it all up into the lengths we needed for the greenhouse. We cut the plywood sheet into strips 8 inches wide. We’re going to screw these pieces to the inside of the foundation wood you see here so we’ll have wood to the ground all around.

We made the ‘spine’ of the greenhouse that will go along the top of the oval we’ll make with the pvc pipe. We’ll attach 10 foot sections to the spine, bend them and attach them with straps along the outside perimeter of the greenhouse.

After we cut the pieces, we put it all in the truck again and carted it to the work site. My husband was wearing shorts and we have lots of briars out there, so I emptied the truck, putting things in piles around the foundation.

We rested, and then a wind came up and rain threatened, so we rushed out to the site and I started moving the stuff I had put in piles onto the black sheeting to keep it from blowing away. Everything is battened down now, but – BOY! – did I get my exercise for the day with all the pulling and hauling of supplies!

Things have calmed down outside now. I’m not sure if we’ll try to do another work session tonight before it gets dark or not. I can tell you that I should sleep well tonight…


Leave a comment

Filed under Lewis projects

Happy Saturday!

Bored Panda

Good afternoon!

It’s a happy day at the Lewises in Greenwood, Arkansas.  The sun is shining brightly and the day is full of possibilities.

We’re going to check into the cost of materials for building a 12′ x 14′ greenhouse on the east side of our property.  Our friends, the Taylors, are building the Taj Mahal of greenhouses. It’s 2 stories and build onto the back of their house.

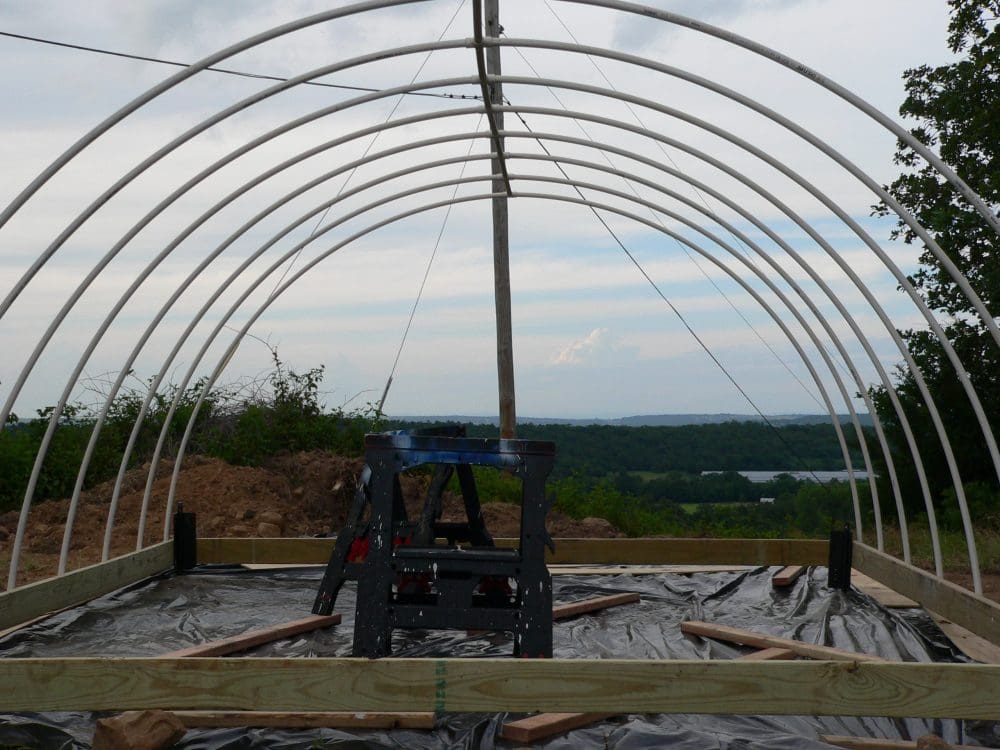
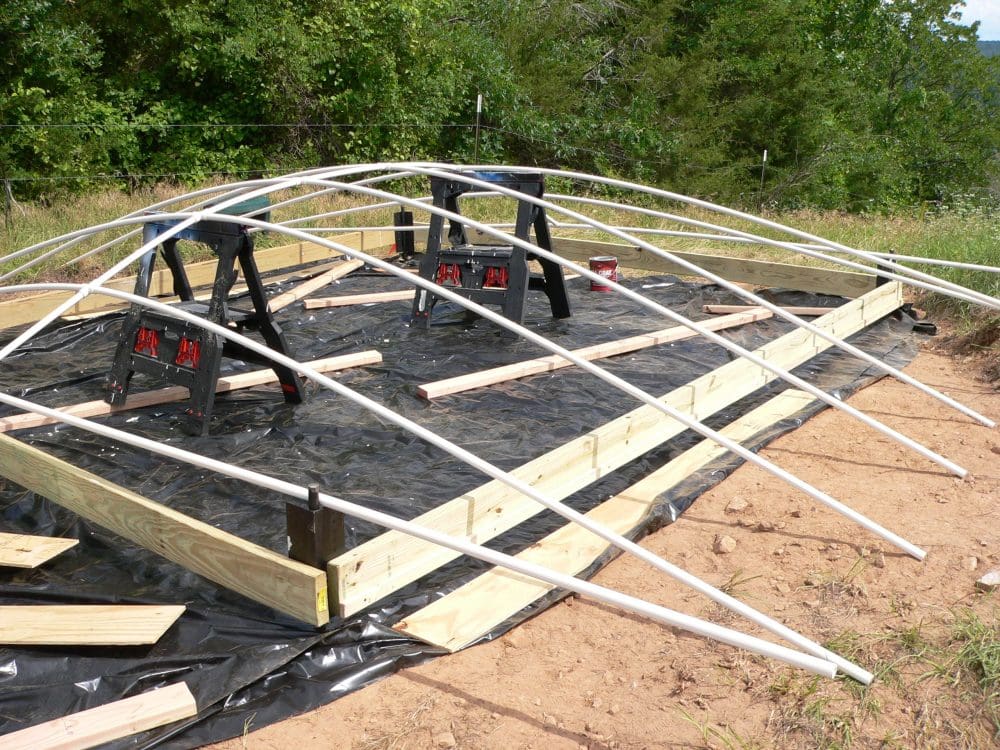
Ours is a DIY plan with wood, pvc pipe and sheets of plastic. I would love an area that is protected from our cats and the weather to start seeds, nurturing seedlings until they’re ready to transfer to the garden, etc.

My husband found some plans, loaded them onto his Kindle, and then was able to print the pages so we could put them into a binder.

How to Build a Backyard Greenhouse – A DIY Practical Guide by Tristan Trubble.


Care2

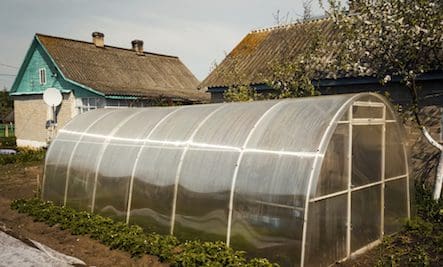
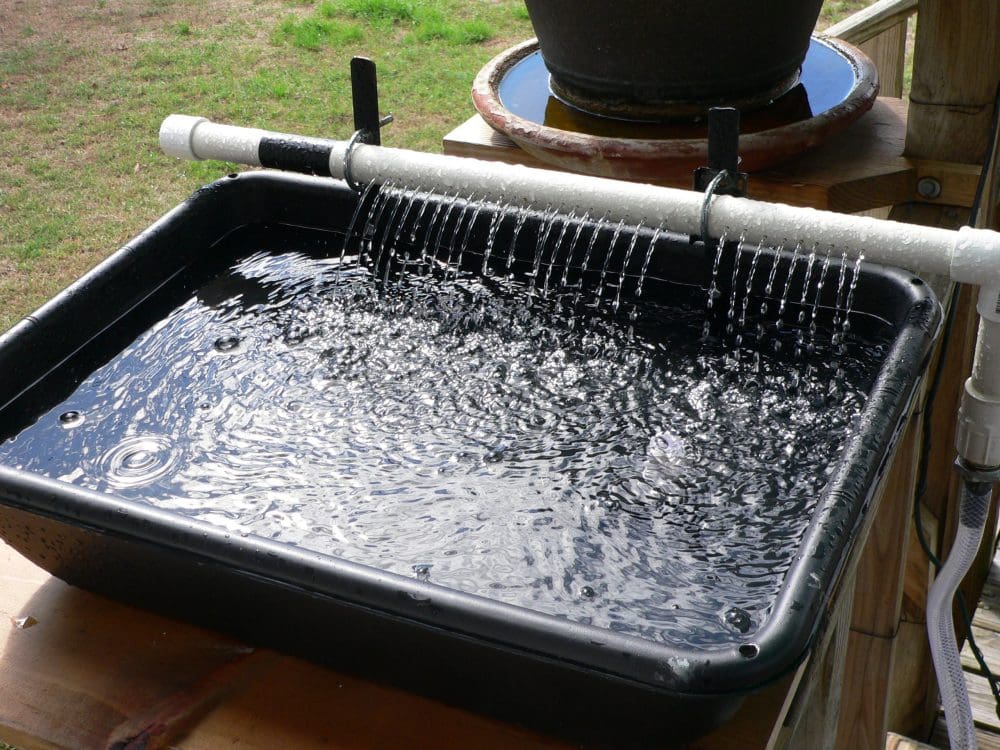
This picture isn’t our plan, but the picture gives you an idea of what we’re thinking about doing. We’re buying all the materials, rather than a kit that is MUCH more expensive.  Ours will be made of wood, PVC pipe and plastic sheeting. We’ll have 9 ‘ribs’ of pvc pipe, rather than the 7 you see here.  We ordered an exhaust fan on the net this morning, whose vents open when the temperature is 74 degrees F., and open FULLY at 104 degrees. There are a lot of details not really covered in the plans, but we’ll work them out as we go.

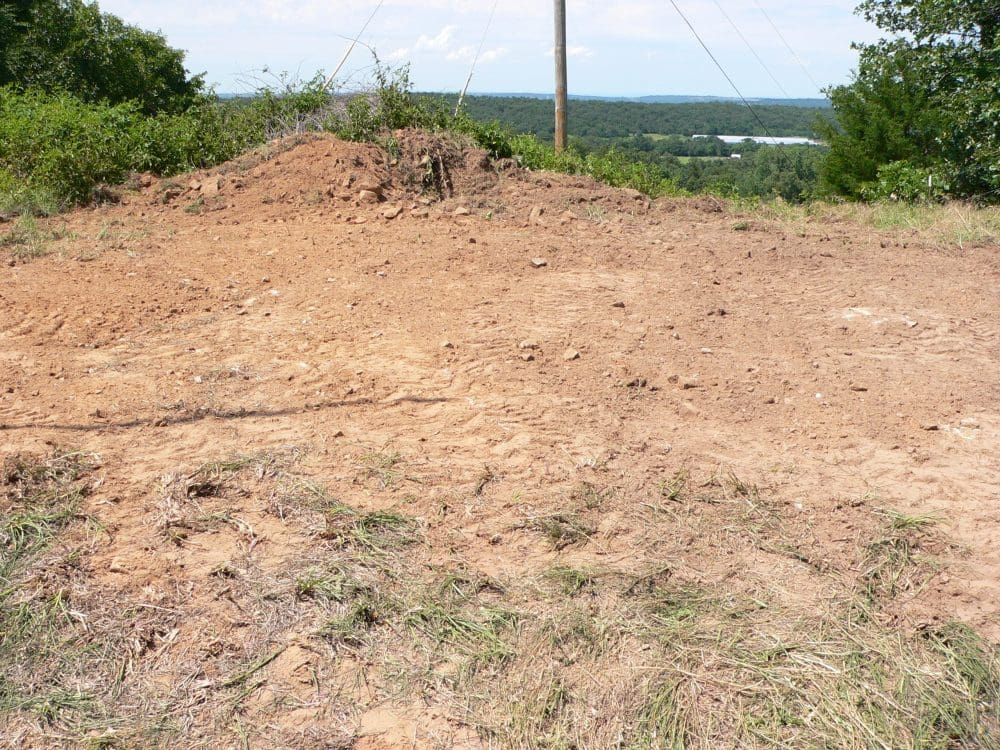
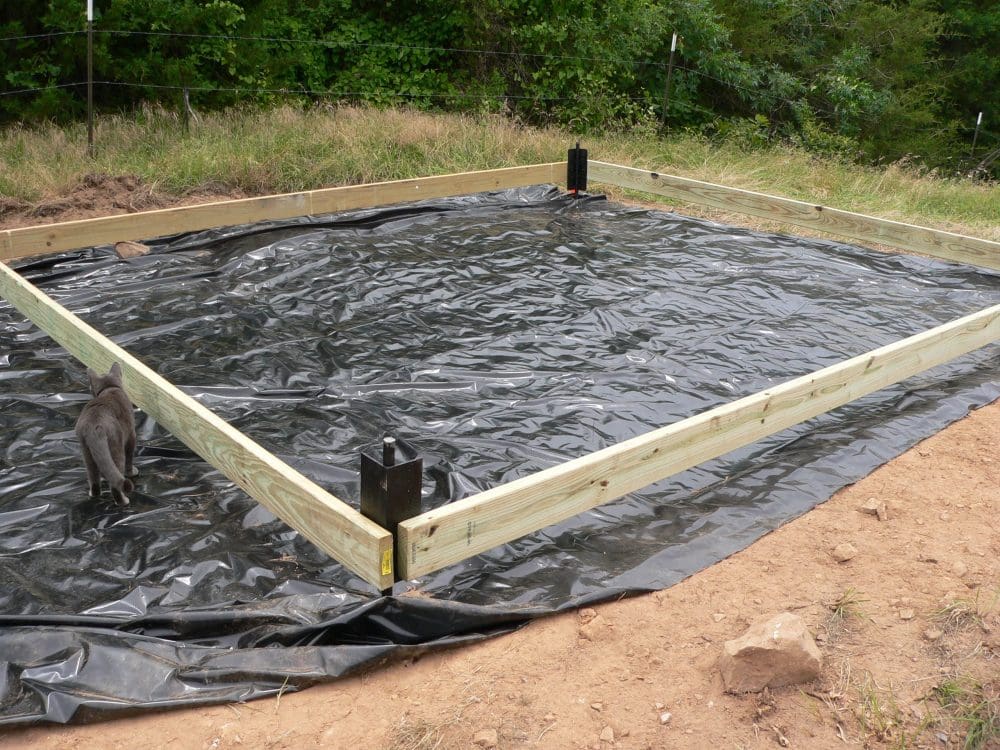
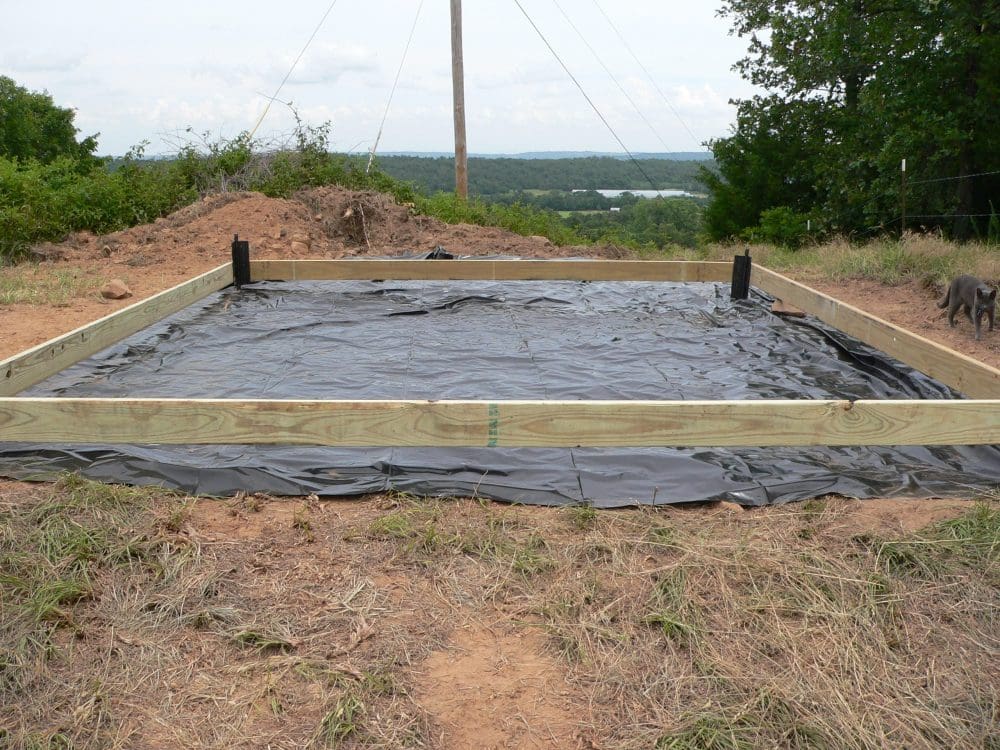
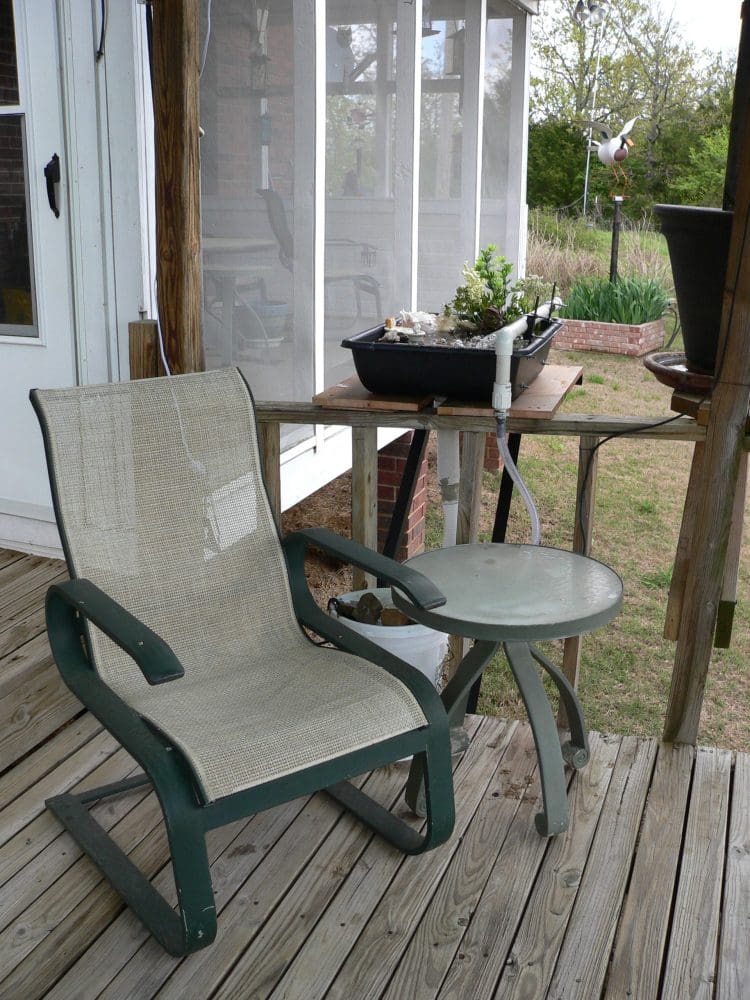
We wandered around our land, rejecting spot after spot due to the fact it wasn’t flat enough, or caused problems for one reason or another. We settled on an area to the east of our tomato planter and the clematis plants on the east side of our property. We can run water and electricity to it without much hassle.

My husband, as usual, wanted to go ahead this morning and start buying parts at our local Yeagers Hardware store. Since he’s going to have a 2nd cataract surgery hopefully May 16th, I pointed out that it would be at least June before we would be in a position to start this.

So far, we bought the fan and also called the wonderful guy who helps us with our 650 foot driveway when it needs to be bladed. We left a message on his answering machine that we want him to clear a 15 x 15 plot of land to the east of our house for the greenhouse, plus blade our driveway when he can arrange to do it.

I’m going to type a list to give to the guy at Yeagers, and then another list for all the other stuff we need to get for the project. I’ll also read the manual that goes with the plans, ask my husband to read it, and then hopefully we can iron out any problems before we actually do much more on the actual construction.

I would love to be able to give serious effort to growing seeds well before the next season starts, having plants ready for transfer for the fall garden, for example.

Wish us luck!

Leave a comment

Filed under Dreams, Gardening, Lewis projects

The Gazillionth Time is the Charm!

After another fix and leaving things to dry overnight, we plugged in the pump today and HOORAAAAAAAY! No leaks!  To be sure, we ran the pump for a couple of hours before declaring it leak free. Then we got out duct tape to secure the trash can top with the holes we had to cut for the various hoses, power lines, etc. We tried to be very careful not to jostle the tub as we did this, and then waited again to see if we had any problems.


I’ve just finished add the ‘stuff’ to the bird bath. Since it’s deep, I put bricks in the bottom and then some river rock on top of those so the hummers will have plenty of places to stand if they just want a shower. There are plenty of places they can simply dive in, too.


Here is the set up. You can see the tub above and the trash can on the deck under the tub. The garden hose is always on. There is a float valve inside the can that will trigger the hose to add more water if the level in the can gets too low. The float valve shuts off the water when it’s happy with the level.


The water is attached to a timer. We decided to run it during daylight and let the pump rest when it’s dark, so no skinny dipping or midnight swims for the little hummers. They can always stand in the water in the tub, but there won’t be a waterfall during the night.


We get a lot of gusty winds, particularly during storms, so I made a point of securing things as best I could. I THINK the greenery will stay put. Time will tell.

The last step is planting flowers. A good friend of mine from Lunch Bunch told me about getting hummingbird flower seed packets. I went to WalMart to find them. They had them kind of hidden, but I finally found them and bought several packages. I’m planning to put a big flower pot on the table beside the chair and see if I can get that seed to grow. If that doesn’t work, I’ll fill the bowl with annuals when we get the other flowers for the deck.

We have two feeders out and the bird bath. Come on, hummers!

Leave a comment

Filed under Lewis projects

Hummingbird Bird Bath – THERE!!!!

I’ll put plants on the railing on either side of the bird bath, and also on the table, but you can get a good idea of what the whole project looks like now.  The bucket attached to the tub catches the water. The pump at the bottom of the bucket recirculates the water. The timer is ‘on’ during daylight and ‘off’ at dark.


I put bricks in the bottom so the water won’t be too deep. I’m picturing hummingbirds standing on the various rocks, shells, etc. and darting through the water. :0)  You can see our cocker spaniel/schnauzer cross, Molly, through the screen of the back porch.


This is a close up of the far end of the bird bath.


I can’t tell you how much we’re enjoying the sound of the water! We have the back door to the porch open to enjoy both the nice weather plus the’water of the ‘waterfall.”


I haven’t seen a hummer yet, but we’re hoping to soon. We have a feeder out, and now, the bird bath, so we hope they’ll feel welcomed. I’ll try to get pics if/when the hummers check this out.

Leave a comment

Filed under Lewis projects

Bird Bath – Almost There

Plumbing is a LOT more complicated than it might seem. After having the hummingbird bird bath together and apart again several times now, fighting leaks, we THINK it’s a go this time. I’m not feeling ANY moisture on the bottom side of the tub. The timer came on as scheduled and the little waterfall was making its pretty noise this morning.


I’m going to check it one more time and then will start putting in decorations that I hope will make the hummingbirds happy when they arrive.

I’ll take more pics later today.


Leave a comment

Filed under Lewis projects

Hummingbird Bird Bath – Try # 4

They say, “The third time’s the charm.” Apparently, we didn’t get the memo because we’re on “TRY # 4” to get the plumbing on the hummingbird bath not to leak. We got it back together again, hooked it up and ran it for awhile, only to find ANOTHER place water was seeping out. I logged about 7,100 steps on my pedometer yesterday with all the back and forth to the shop yesterday working on it.

We took that apart and put pipe dope on it and stuck it together again. We turned the water on again and didn’t see any leaks this time. We were going to check it again in half an hour, but then it started to rain. Until everything is dry again, we won’t know if we’ve been successful this time or not.

I’ve taken all the decoration out of the tub twice thus far. I’m not going to put anything in there until we’re sure we have the leak problem fixed. (I did get some nice-looking greenery to add at the store yesterday :0) )

Here is how the system looks now, as we test the plumbing –


If all goes well, I’ll plan to add decorations to the tub tomorrow. I’ll take pics when the decorations are in. Meanwhile, we hung up a feeder in case we have any hungry hummers in our area.

Leave a comment

Filed under Lewis projects

Frustration

Pinterest

I added the timer to the hummingbird bird bath this morning and took a couple of pictures, because I thought the water looked so pretty in the sunlight.


THEN, I noticed the pump was kind of ‘hiccuping’. I added water to the pump and it got a bit better, but still didn’t act right. When my husband and I looked at it together, we realized we must have a leak somewhere.

Since this morning, we’ve had the whole thing apart and together again TWICE. Right now the tub is in the shop again, with a fourth idea for sealing the water level valve. We also went to a flexible tubing, rather than the rigid pvc pipe set up we had, because it was pushing against the bottom of the tub, causing a bit of strain.

SO –

We’re letting the newly sealed valve dry overnight and we’ll try things again tomorrow – or the next day if we get rained out, as forecast, tomorrow.

Meanwhile, I got some more greenery and will rethink the toys and arrangement when they go in again – assuming we can get the system to quit leaking!

3 Comments

Filed under Lewis projects

The Hummingbird Bird Bath is Finished!

The actual hummingbird bath is now finished. I’ll add plants on either side of the bath on the railings, plus a basket of flowers for the table, hummingbird feeder hanging above somewhere, etc., but the main project is finished.


I gathered things from around the house to put into the bath – a ceramic bath tub with a lady in it, three glass hummingbird feeders that were prettier than they were practical, shells, a frog, some aquarium decorations, some rocks, and some bricks – both for the decorations and in the middle for the hummingbirds to stand on, if they wish.


Here you can see the ‘stuff’ I’m hoping the hummingbirds will like. I can see myself changing things from time to time, which will be half the fun of the bird bath!

I LOVE the sound of the water. I really hadn’t thought of that, and I find it very appealing and relaxing. Between that, and the wind chimes from the back porch, it will make a great spot for us most of the year.

When the hummers come, I’m hoping they really like it. I’ll try to get some pics if they do.


4 Comments

Filed under Lewis projects

Phase 2 – Hummingbird Bird Bath Project

We finished the plumbing part of the hummingbird bird bath project today!  We had ‘gooed’ the drain pipe fitting last night and let it dry for 24 hours. We had to cut another hole in the bucket lid to accommodate the pipe coming from the bottom of the tub in a straighter fashion.  This set up will allow the bird bath to sit quietly when the pump is not on. When the pump IS on, the water recirculates from the tub, down into the bucket and back. The only water we’ll need to replace is from evaporation from time to time. We’ll put a timer between the pump and the electrical hookup so the water will be on in daylight and off at night.


Here we have the water on, making a kind of waterfall for the hummers.  The place we ‘gooed’ last night is good. We still had some drips from the place where we attach the pvc pipe to the side of the tub. Tightening the screws more got rid of the leaks. A happy thing we didn’t expect was the NICE sound the ‘waterfall’ makes!


Here’s a close up of the basic tub and waterfall.

Phase 3 will be gathering ‘stuff’ to put in the tub – greenery, rocks, bricks, fun decorations, etc. I’ll take pics again when I’ve gotten the decorating started.

Leave a comment

Filed under Lewis projects

I Have the Sleepies

“Dog – Tired” – Michelle Cazares

My husband and I went to get more parts for the hummingbird bird bath project this morning. We have it almost finished. We got it together and tested it, but it was leaking from the bottom of the tub. We took it back into the shop, dried it, and put a really expensive ‘goo’ that’s a good sealer around the fixture in the bottom of the tub. We’re letting it dry for 24 hours and then will put the bird bath together again tomorrow. We got a timer today so that it will be on in daylight and off during the night, making the pump last longer (we hope.)

I’ll take pics when we get it back together tomorrow, and then I’ll start gathering goodies to put into it to entertain the hummingbirds…

I’ve got the sleepies now, so I’m going to step away from the computer and rest a bit.

Hope your day is going well.


4 Comments

Filed under Lewis projects